Intro:
Nutanix had Akropolis Hypervisor plugin for XenDesktop Machine Creation Services for some time now but it was tied to a leash “NDA” not to mention officially unsupported by Citrix. In Synergy both companies announced official support for AHV utilizing MCS with the release of XenDesktop 7.9 .
Now that XenDesktop 7.9 has been released, so has been the official AHV plugin for MCS thus without further adieu lets get into installing and configuring XD 7.9 MCS with Nutanix AHV using nested Nutanix community edition on ESX.
This is going to be a single post with 2 parts. Firstly we will install and configure Nutanix Community Edition nested on ESX, create AHV cluster, and build server 2012 R2 base image. Secondly we will install AHV plugin, add AHV hosting, and create some virtual desktops. Note that this would work the same for production Nutanix deployments except you would forget about part 1.
Scope:
Part 1: Deploy Nested Nutanix CE
- Prepare ESXi for nested Nutanix community edition.
- Deploy nested Nutanix community edition cluster ” Single controller cluster”.
- Configure Nutanix cluster settings and deploy Server 2012 R2 Base Image.
Part2: Deploy XD MCS with Nutanix
- Install AHV MCS plugin on XenDesktop 7.9 .
- Add Nutanix cluster to XD Hosting .
- Create Session Host VDA`s utilizing MCS .
- Test, Test, Test .
Prerequisites:
- VMware ESXi 6.0 host and/or cluster.
- 500GB available disk storage (local or shared). SSD is required but we are nesting so that can be emulated virtually.
- Intel CPU, 24GB available memory, and Intel NICs.
- Nutanix Community edition and AHV MCS plugin. (download from Nutanix account).
Part 1: Nested Nutanix CE on ESXi.
1- Download Nutanix CE Edition from http://www.nutanix.com/products/register/ . You also need Nutanix NEXT account when logging in to PRISM.
2- Using WinRAR Extract the ce-2016.04.19-stable.img.gz and rename file to ce-flat.vmdk
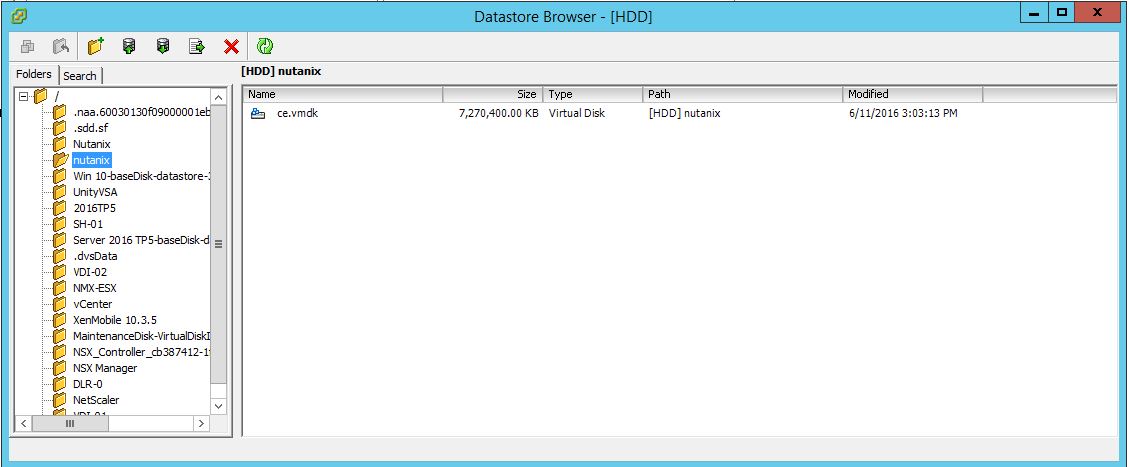
3- Download the following descriptor file here and rename to ce.vmdk

4- Upload both vmdk files to desired Datastore where Nutanix CE will be stored and thus all underlying virtual desktops/ Session Hosts.
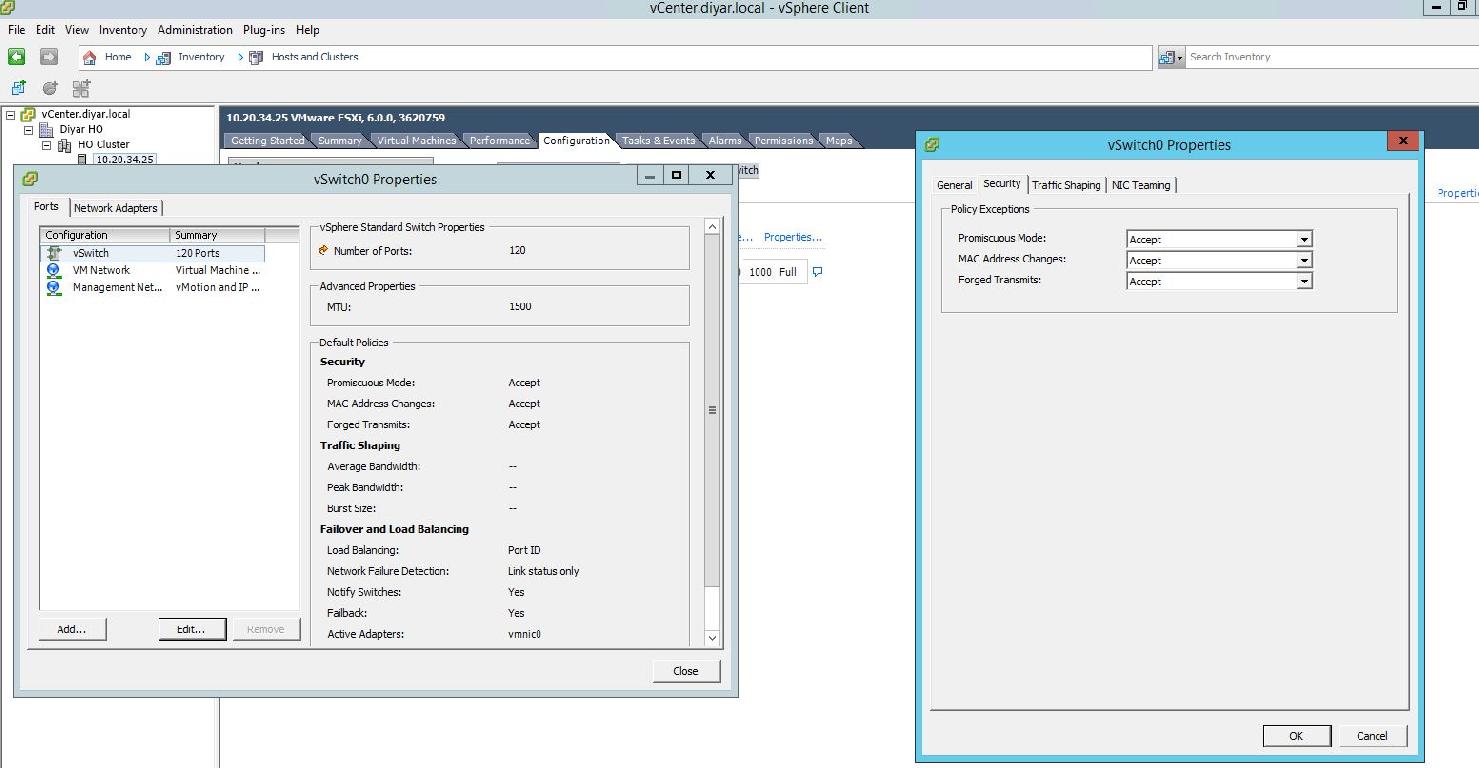
5- On ESXi, go to Virtual switch settings and allow Promiscuous Mode.
6- For Better Network performance for nested VMs , check this out VMware Fling Mac Learning Filter Drive
7- Login to vSphere Web and Create New Virtual Machine with following settings :
CPU: 4 (Expose Hardware Assisted Virtualization)

RAM: 16GB
SCSI Controller: VMware Paravirtual
NIC: E1000

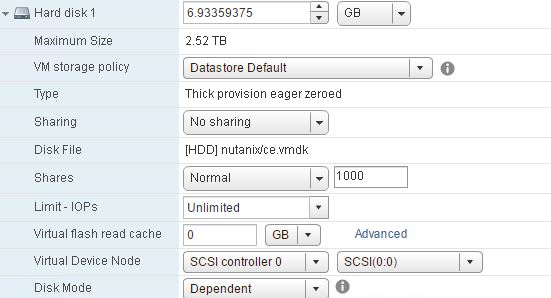
Hard disk 1 (SCSI 0:0): existing CE image vmdk (Delete existing disk created with VM and attach uploaded CE VMDK)
Hard disk 2 (SCSI 0:1): New 500GB vmdk on SSD (Thin Provisioning) We dont have SSD so dont worry just continue …
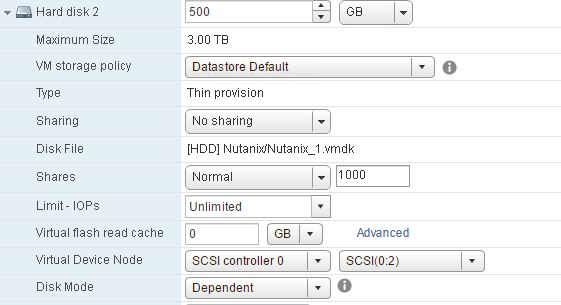
Hard disk 3 (SCSI 0:2): New 500GB vmdk on HDD (Thin Provisioning)
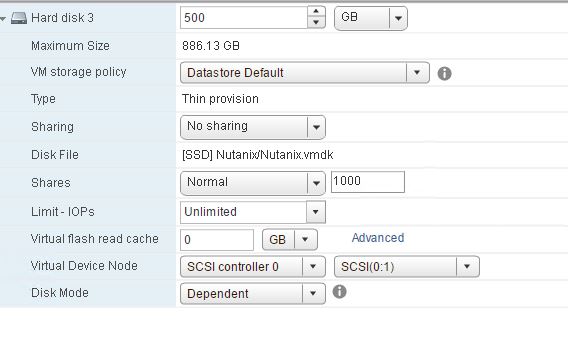
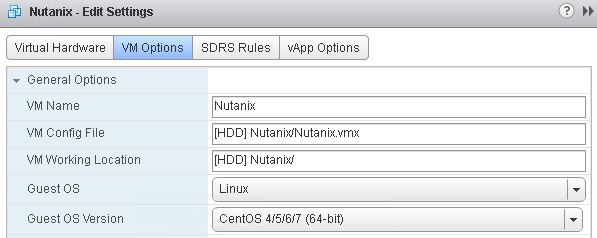
OS: Linux – CentOS 4/5/6/7 (64-bit)
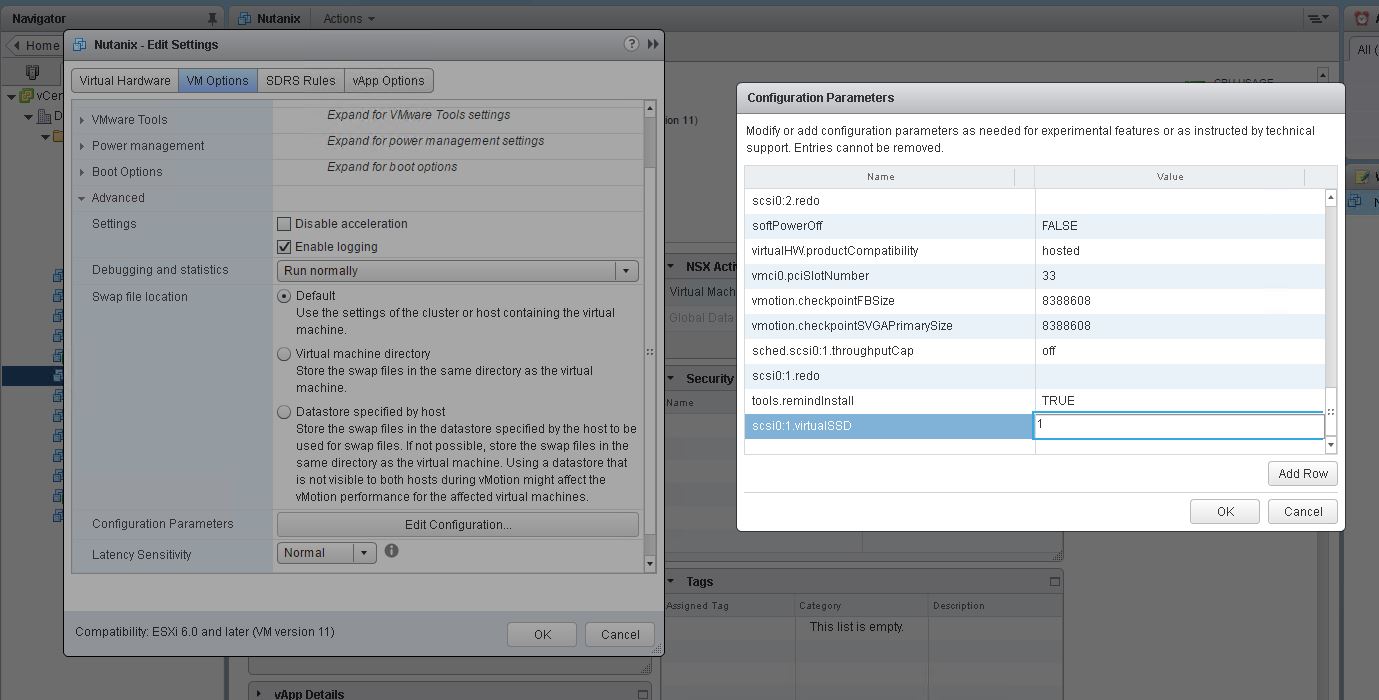
8- We do not have SSD disk so we are going to emulate it by tricking the virtual machine into beleiving SCSI 0:1 is on an SSD drive so go to Virtual Machine settings, VM Options, Advanced, Edit Configuration, Add Row:
scsi0:1.virtualSSD = 1
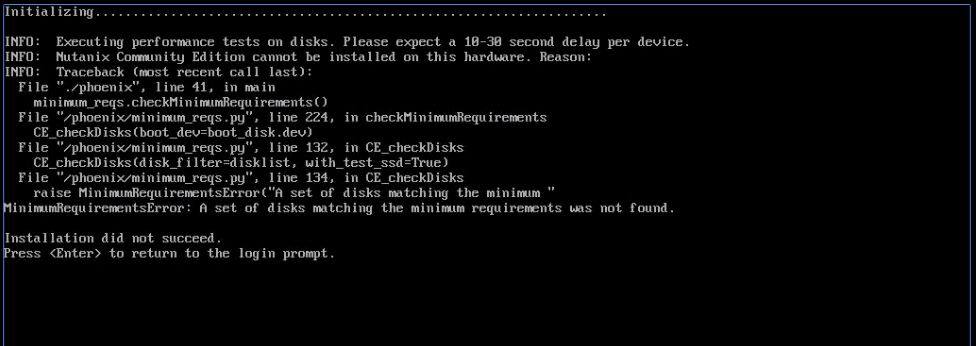
9- Step 8 might not work depending on your storage specs thus we can also do the following to guarantee this would work for different scenarios. Lets lower the IOPS threshhold requirement on Nutanix CE:
edit sysUtil.py with VI after logging in to Nutanix CE with username: root & password: nutanix/4u
vi /home/install/phx_iso/phoenix/sysUtil.py
SSD_rdIOPS_thresh = 50
SSD_wrIOPS_thresh = 50
To save with VI and exit press “Esc” key and ZZ .
10- Step 9 also might not work so we can also try the following to manually set SCSI adapter as SSD:
– Login: root. Password: “nutanix/4u”
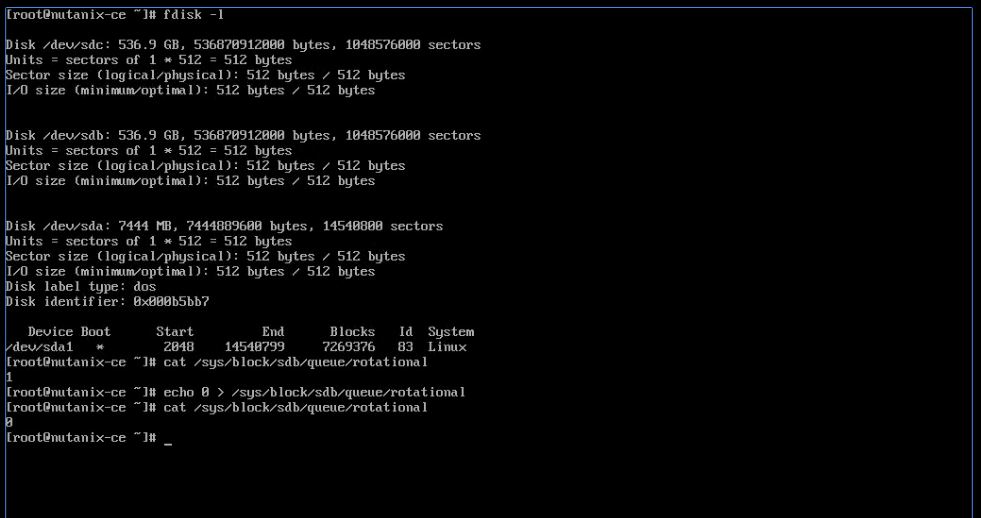
– Identify your “SSD” and “HDD” -> “fdisk -l”. Would be sda or sdb or .. Note that as it is required below
– Run “cat /sys/block/sda/queue/rotational”. 0 means SSD and 1 means HDD.
– Run “echo 0 > /sys/block/sda/queue/rotational” to change the value from 1 to 0
– Type “Exit” and then login with username install
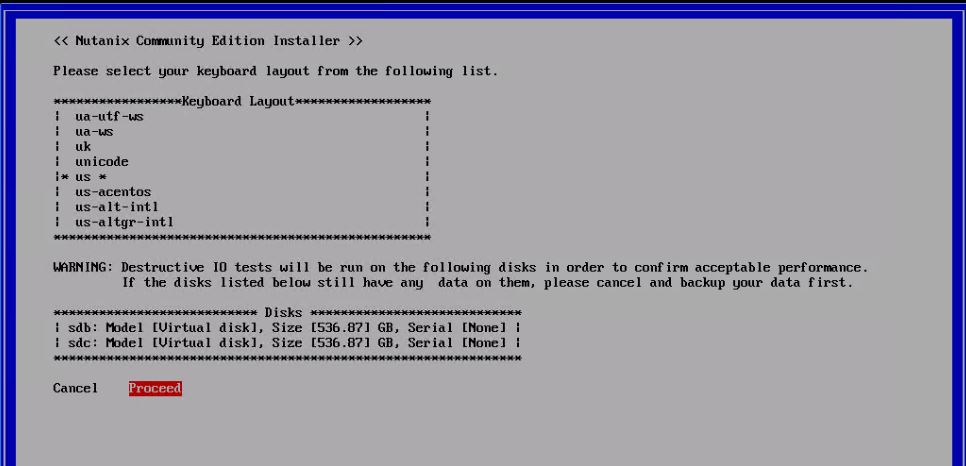
11- Login with username: install and press Proceed . Wait for the disk validation process.

12- Choose Create Single-node Cluster and specify DNS server.
13- Enter IP configuration for Nutanix CE and Nutanix CVM (controller). Scroll the EULA to buttom, Accept it and Start

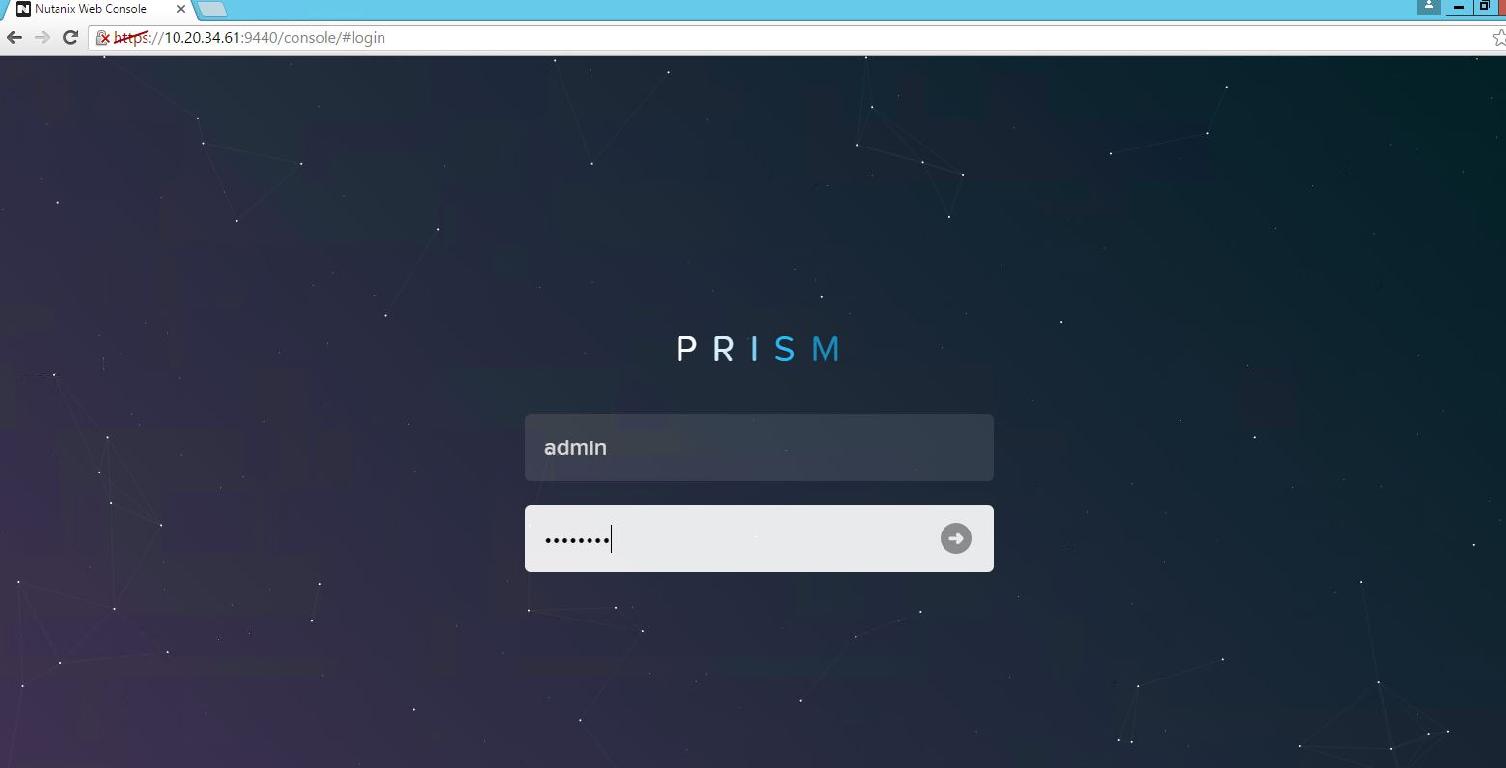
14- After deployment is completed , head to http://CVMIPADDRESS and login with username: admin , password: admin . Change
default password and enter NEXT account information.
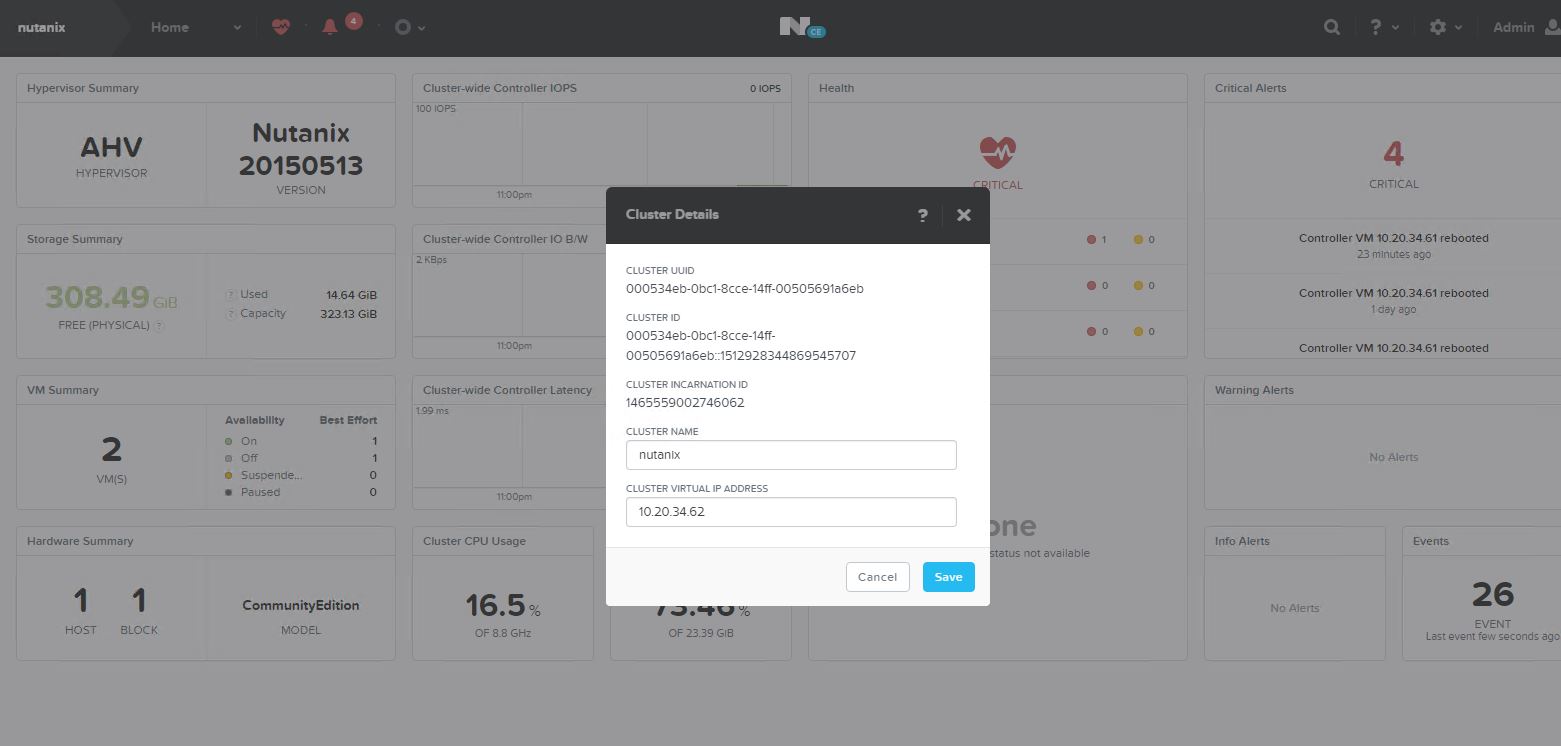
15- Head to settings and assign a name and IP for cluster . Create A record with cluster name in DNS.

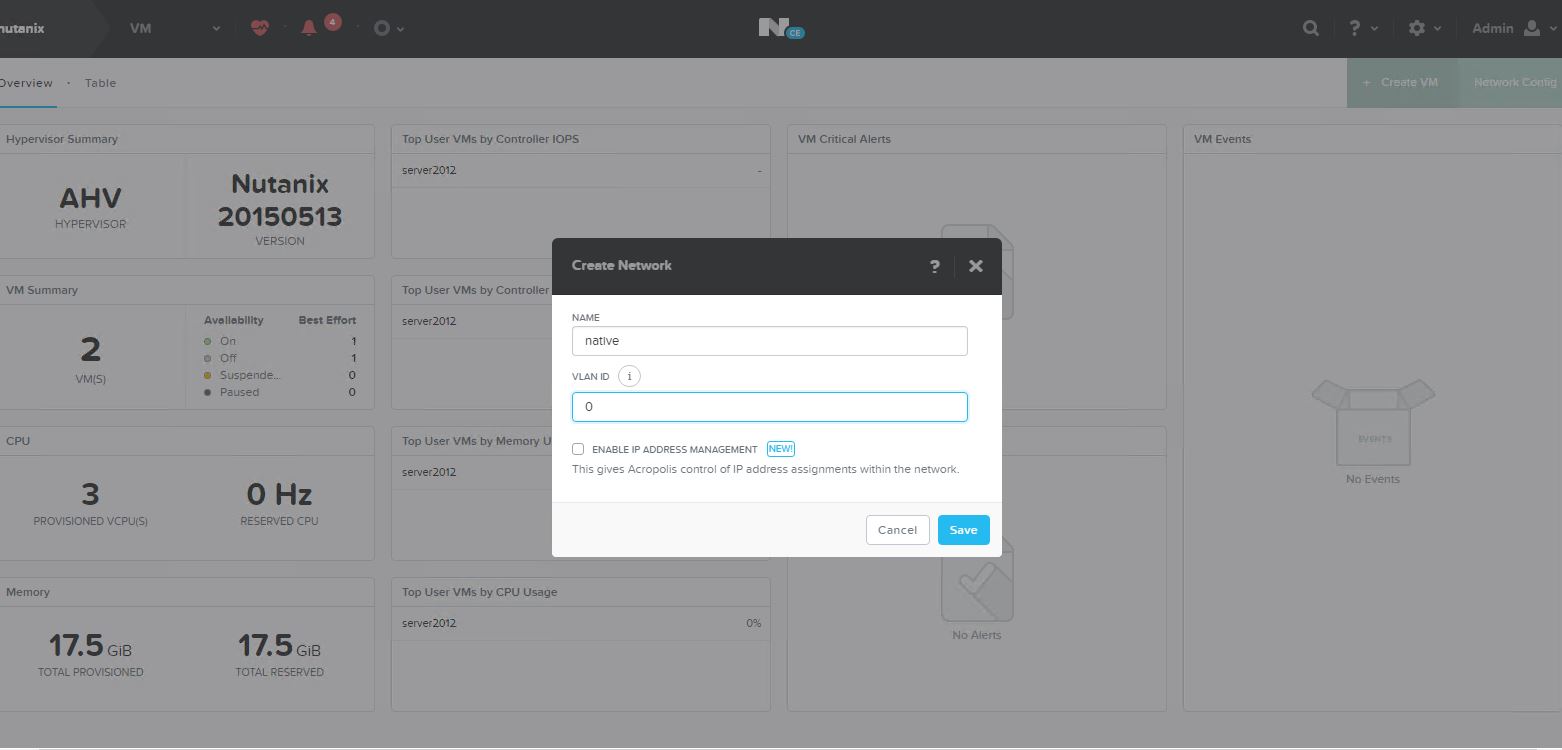
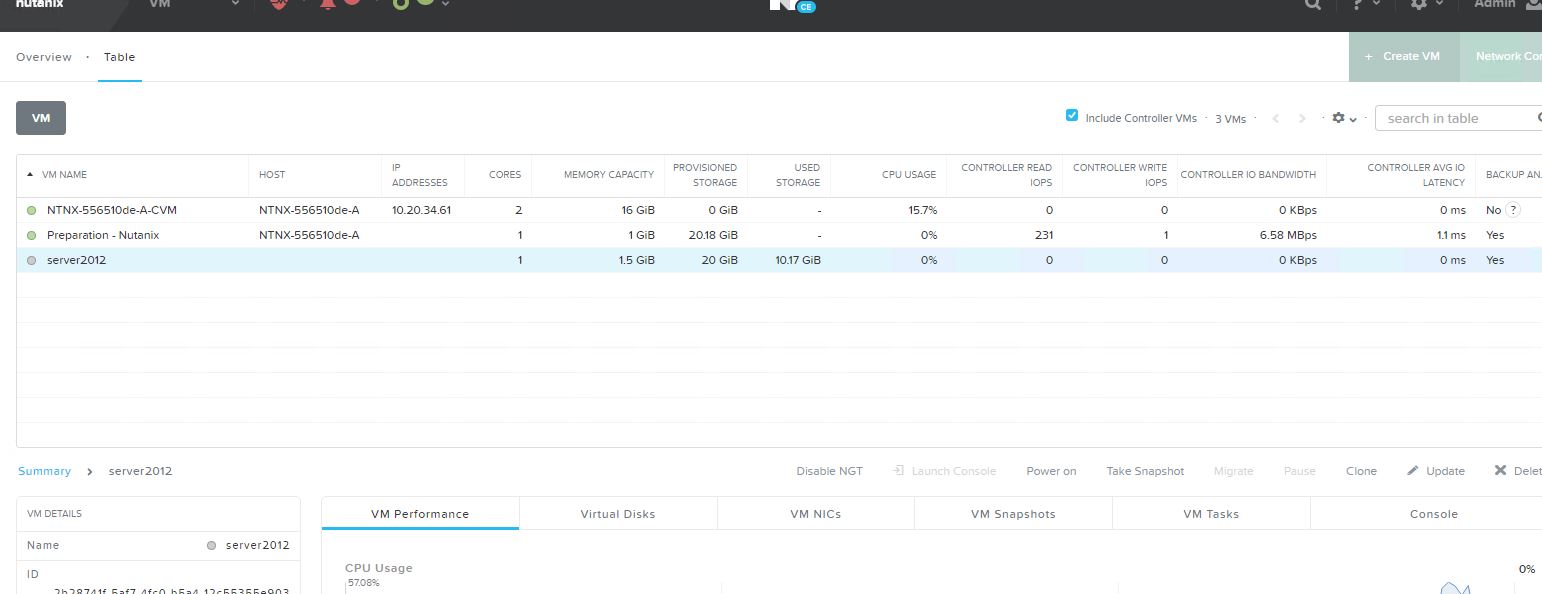
16- Head to VM tab and create network with native VLAN 0 .

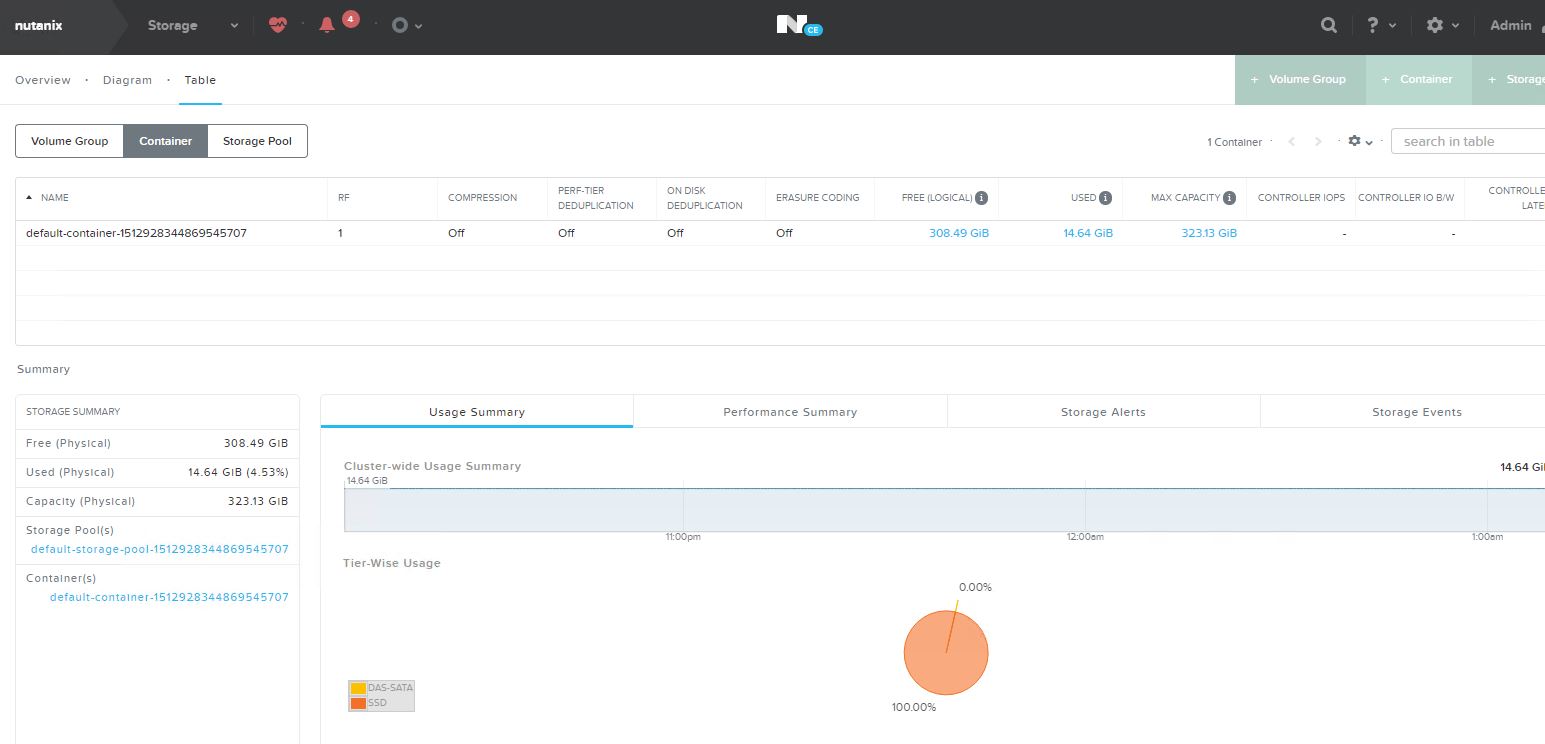
17- Head to Storage and verify default containor and Pool with available usable storage.
18- Shutdown Nutanix CE VM and change VM RAM to 24GB. Start VM and verify cluster IP is reachable.
Part 2: XenDesktop 7.9 MCS Acropolis plugin
1- Download NutanixAcropolis-MCS-XD7.9_or_later.msi from Nutanix.

2- Install NutanixAcropolis-MCS-XD7.9_or_later.msi on XenDesktop Controllers. Simple next, next, next procedure.
.JPG)
.JPG)
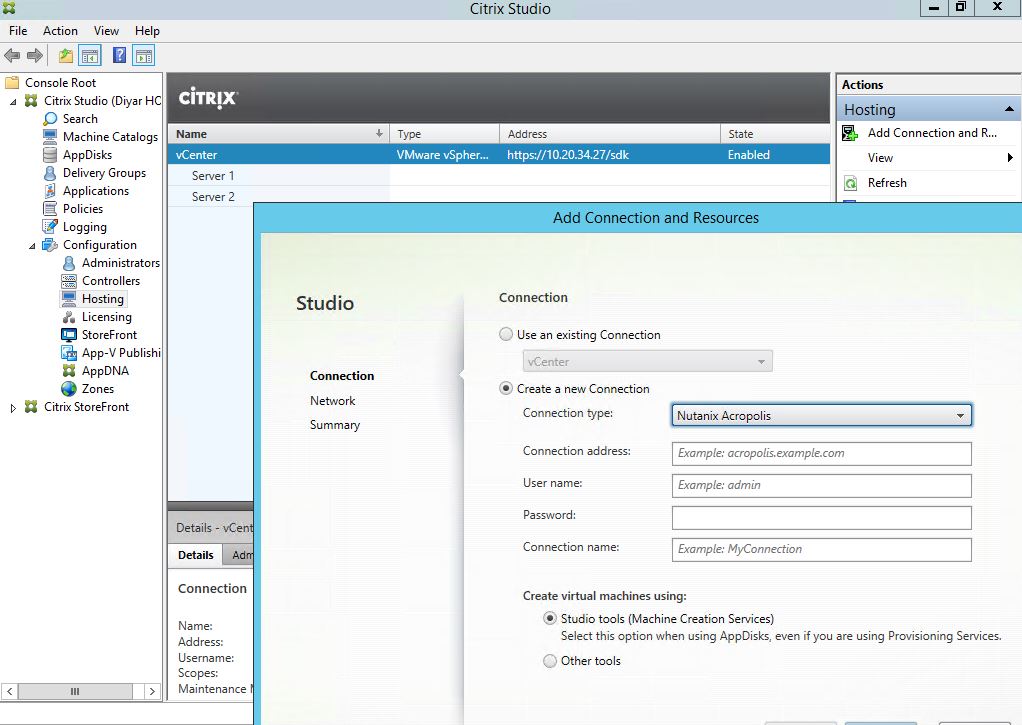
3- Add Nutanix CE cluster to XenDesktop 7.9 Hosting.
Nutanix Acropolis option now appear in Connection type:
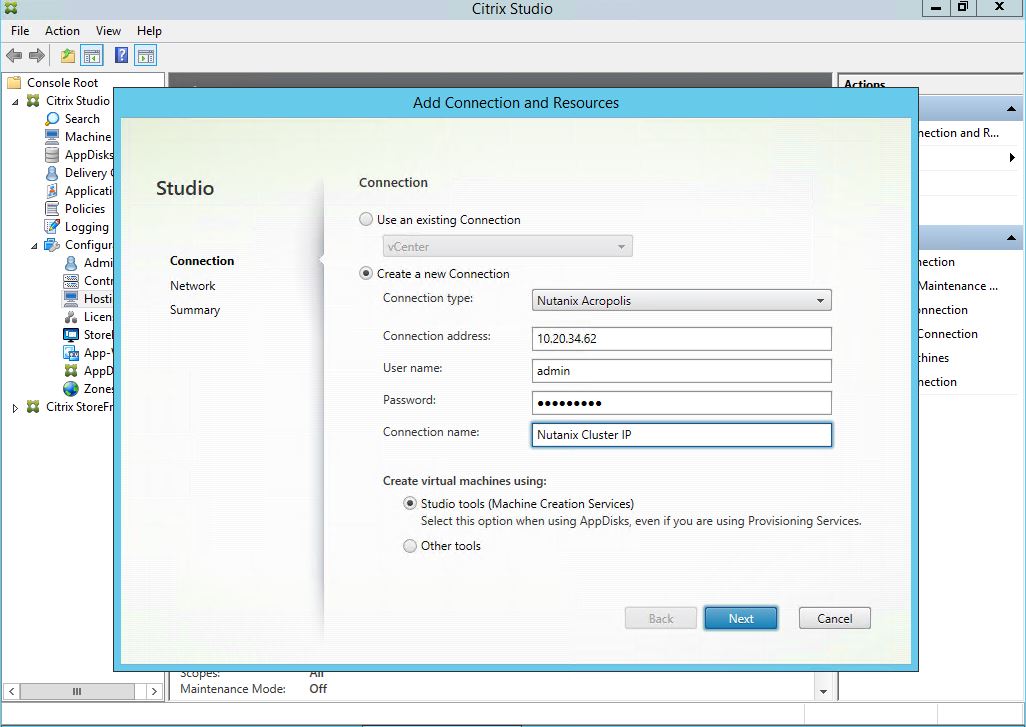
Connection address is cluster IP or cluster hostname assigned ealier in PRISM. The reason being simply because in real world production scenario you need a minimum of 3 nodes to run a cluster thus you need 3 CVMs , If you put your address as on CVM and later it fails , you will lose connection to the whole cluster that is why it is mandotary to use cluster IP/Hostname.
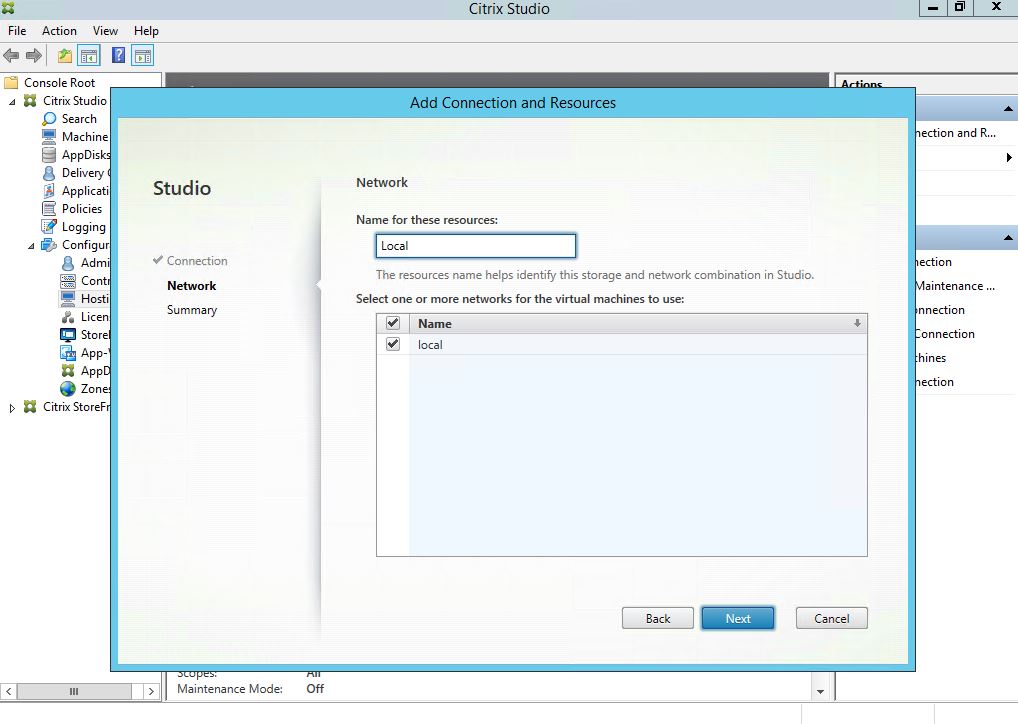
Network created earlier through PRISM. You can add as many networks as you want. In nested situations dont forget promiscuous mode to be enabled on port group or VM network.
Next and Finish !
4- Create Server 2012 R2 or Windows 10 Base Image and install VDA (I am not going to optimize for this demo just showcase VDA functionality).
Because I am using Nested CE, Windows would not recognize disk drivers out of the box so I have to install them, same goes for NIC driver (I noticed that installing NGT would get the required NIC drivers so need to manually install from virto) never the less with production Nutanix clusters there is no need for this so if you have that dont mind what you are about to see. Download drivers from here .
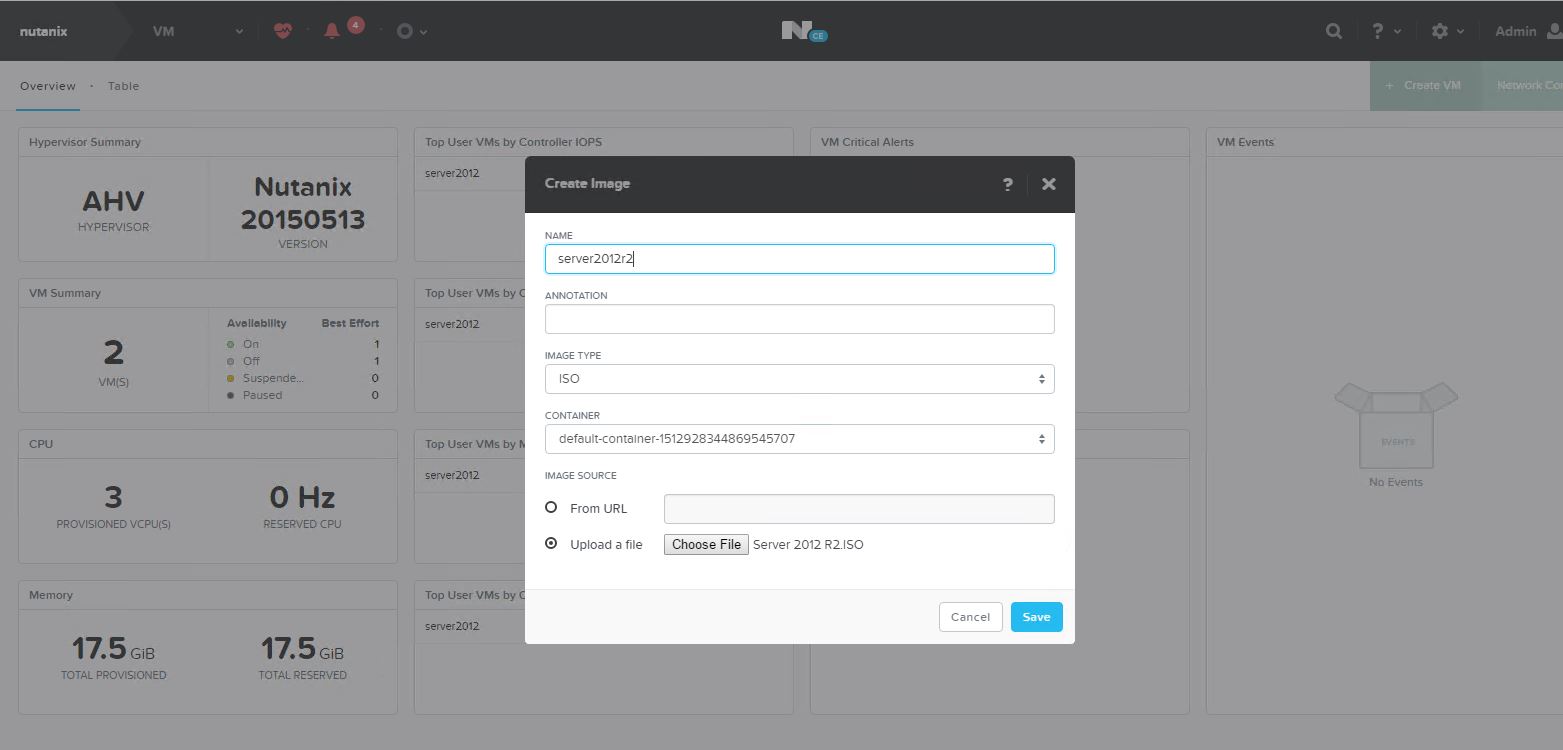
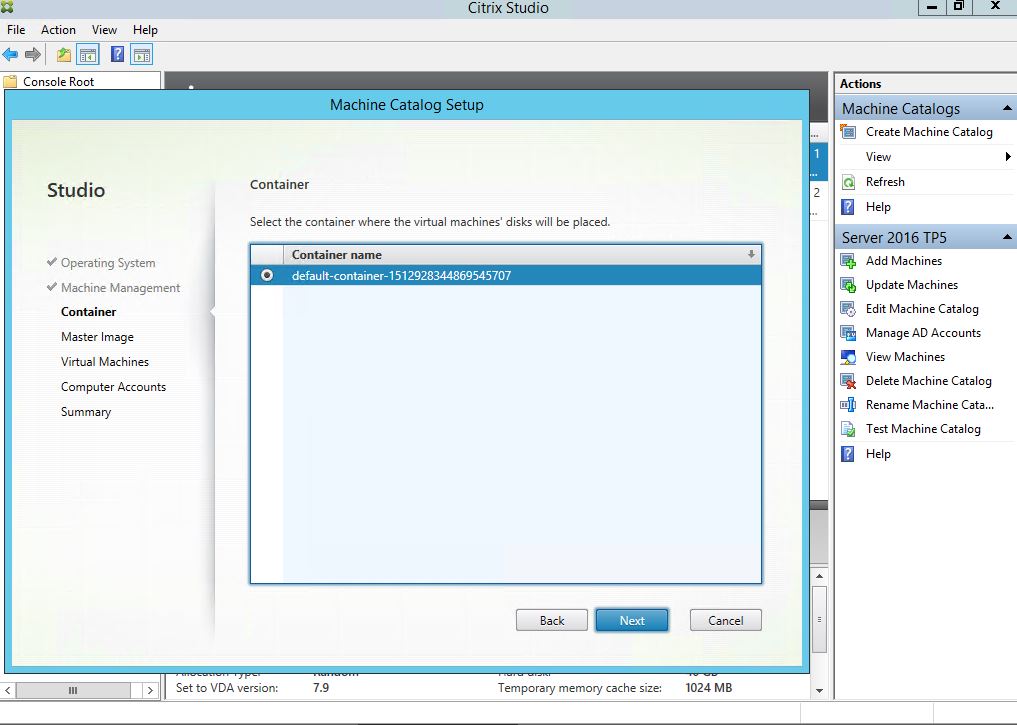
– First lets upload server2012R2 ISO so that we can install an OS directly from an attached ISO image from Nutanix Containor. Go to Settings, Image Configuration , Upload Image, Upload a File, Image type ISO, Choose your ISO, Keep default containor, Name it and Save.

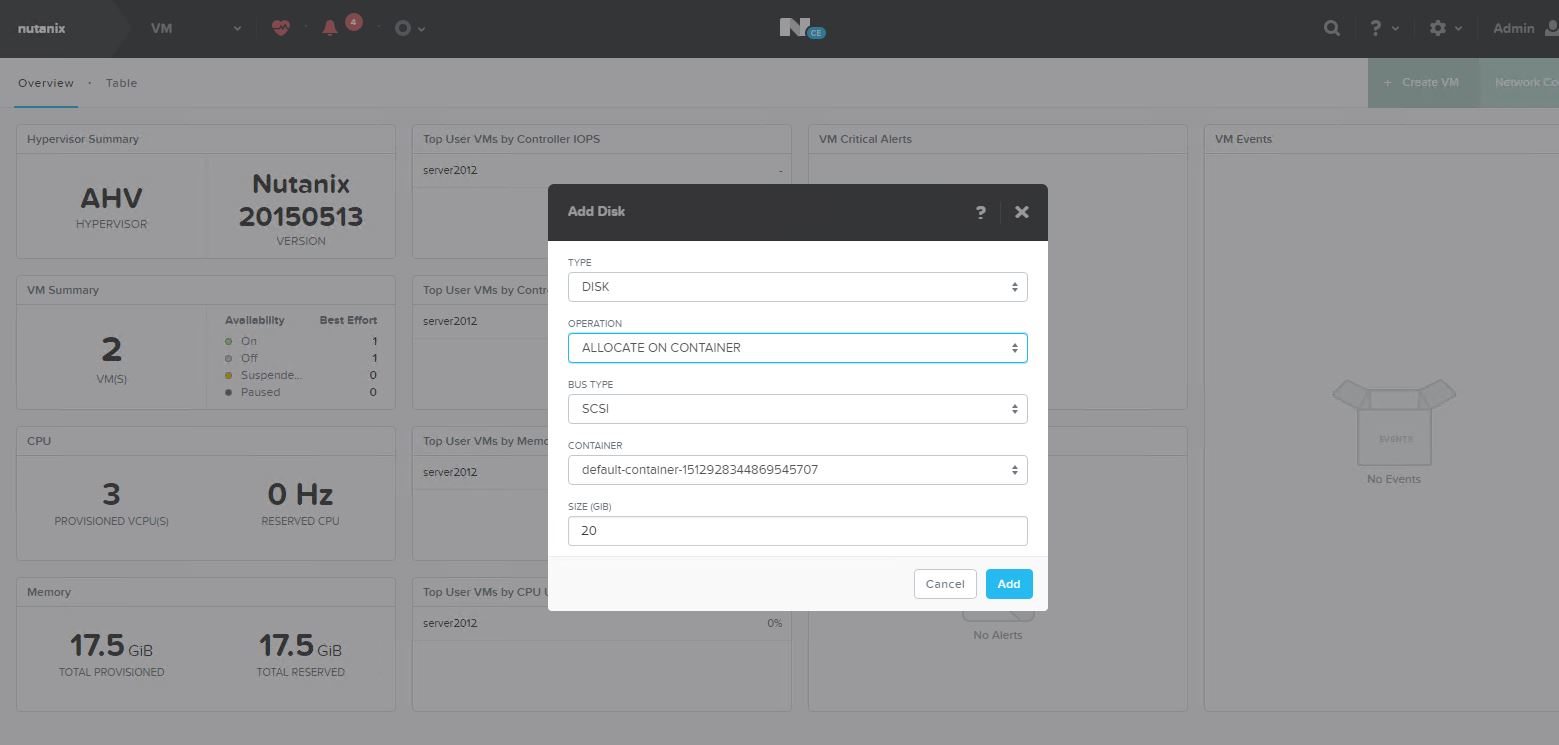
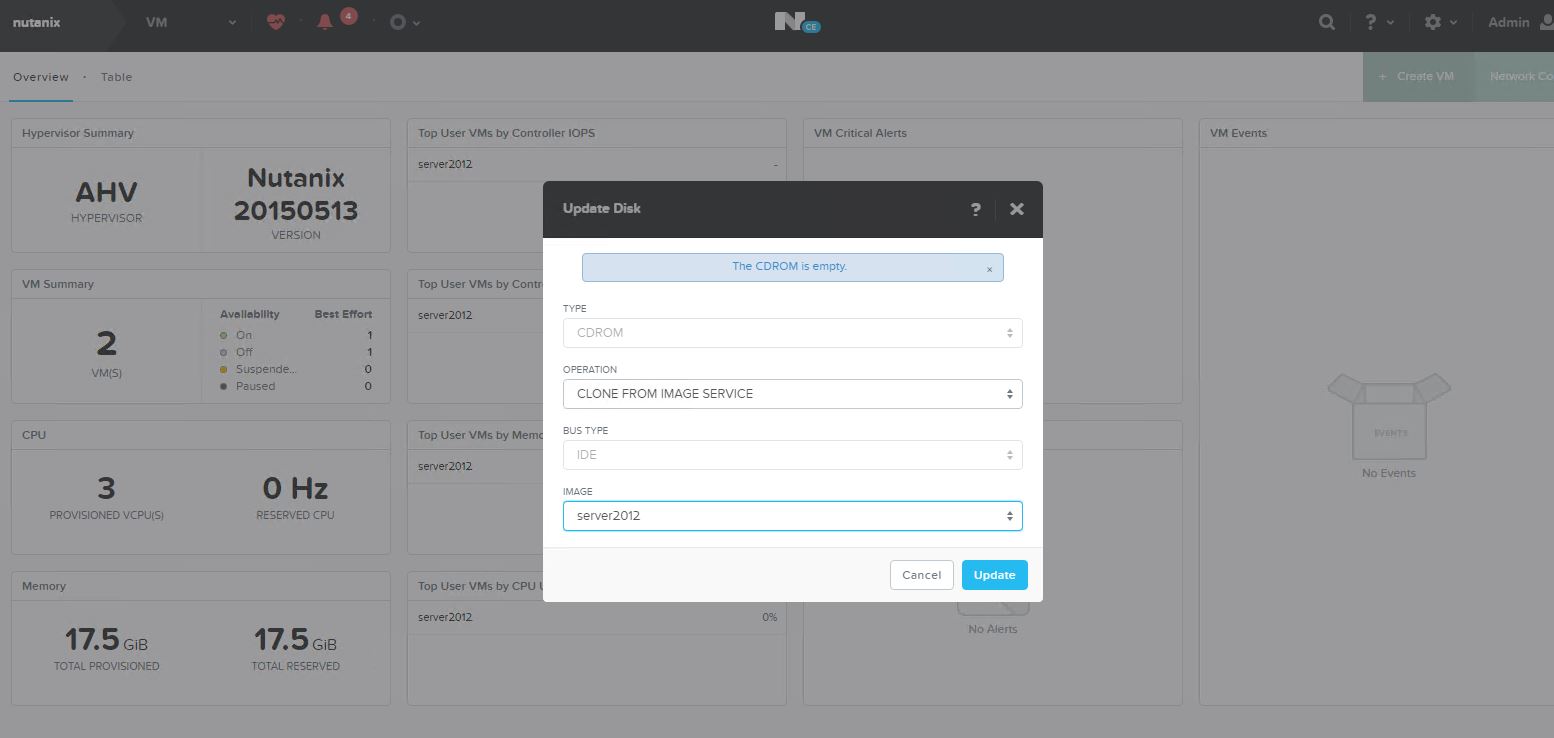


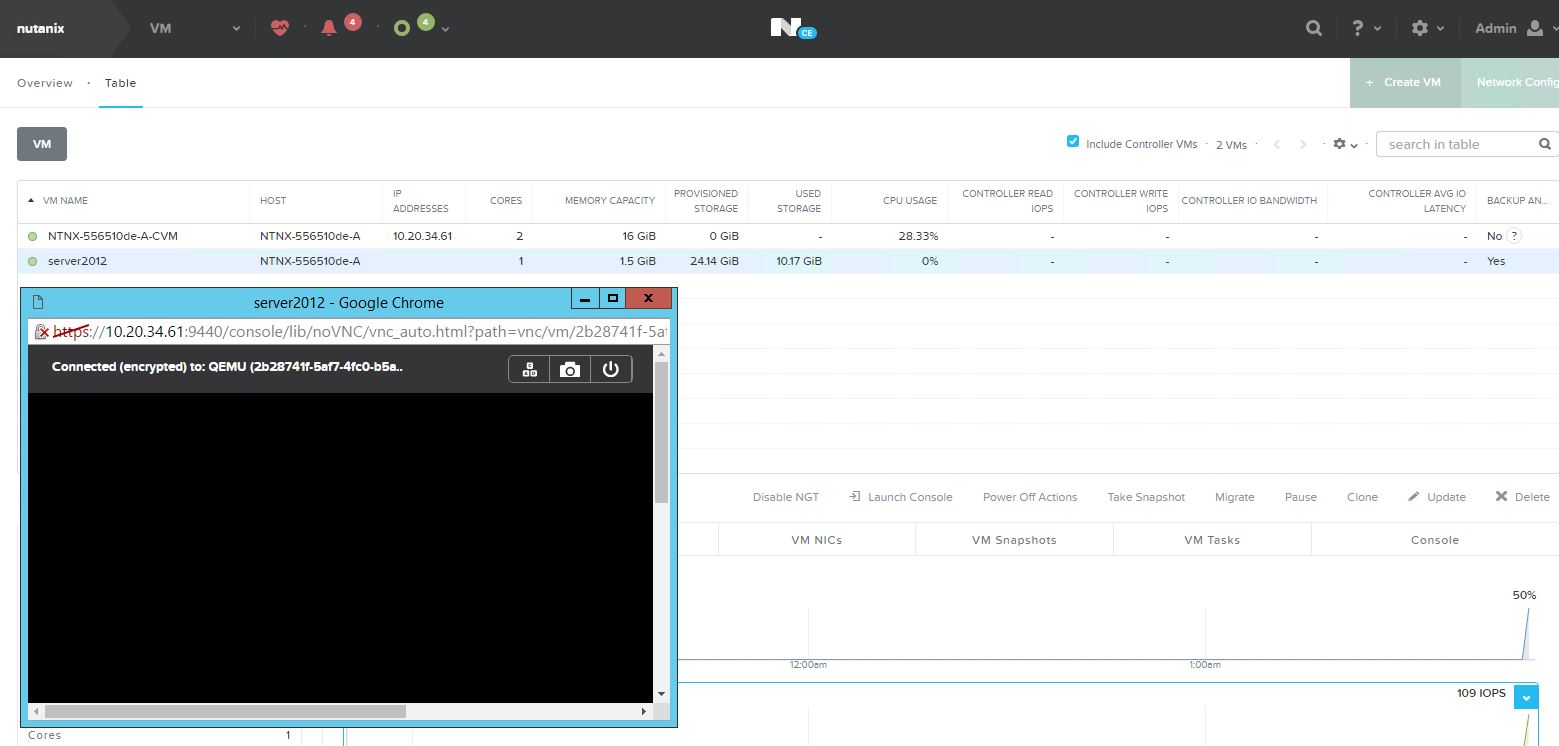
– Go to VM, Create VM, specify Name, CPU, Memory, Add New Disk, Edit CDROM for ISO, add secondary CDROM for drivers ISO, Add new NIC, Save.
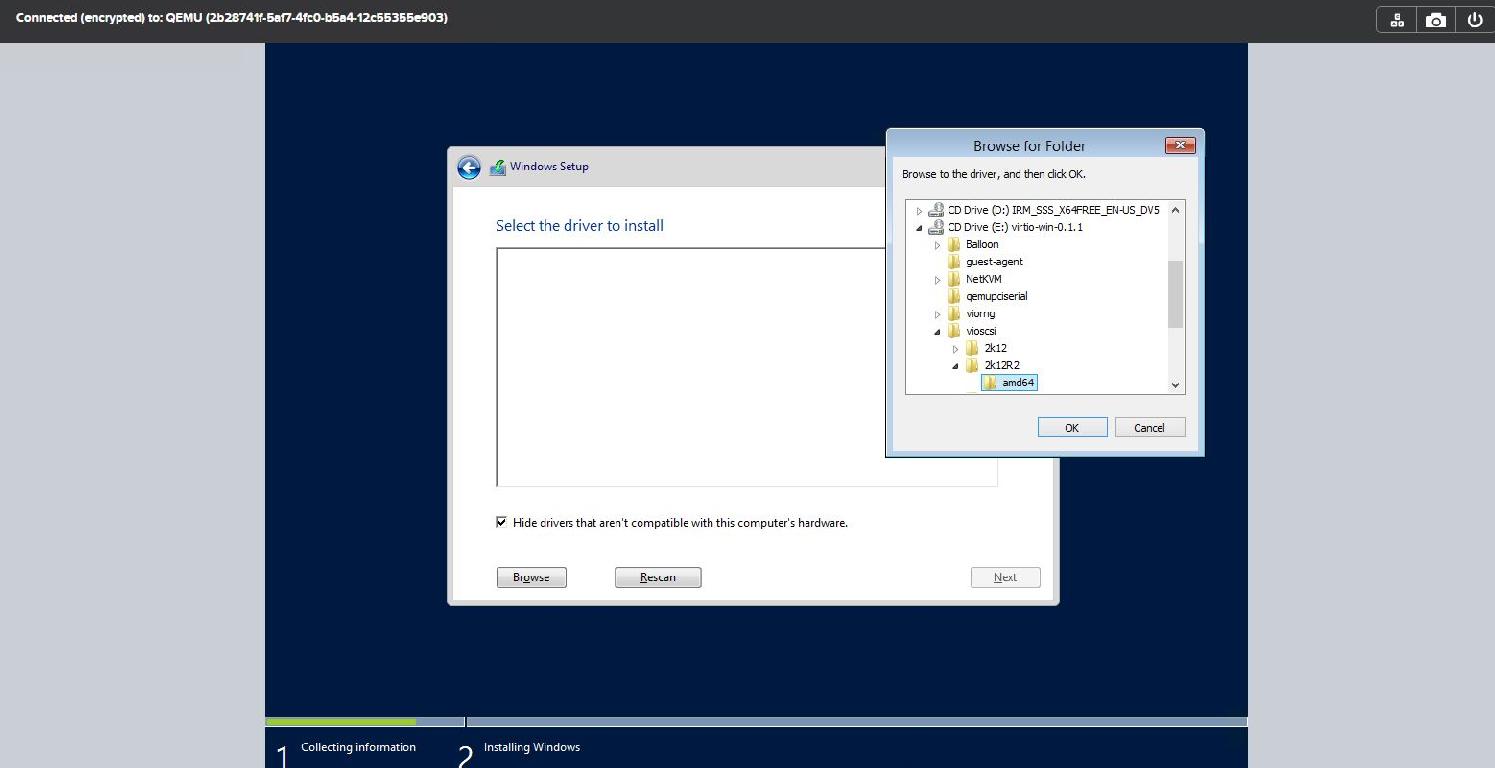
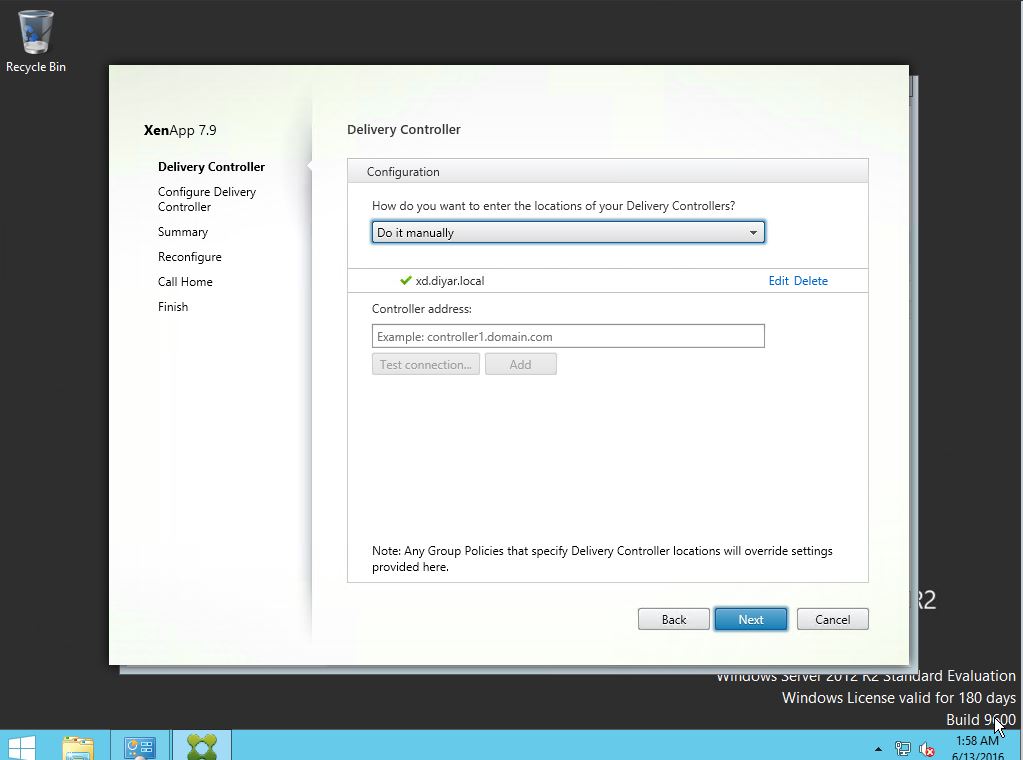
– Power On VM, Install Windows OS, Choose Disk Driver from secondary ISO, Finish Installing OS,Disable Firewall, Join to Domain, Install XenDesktop VDA, Install NGT.
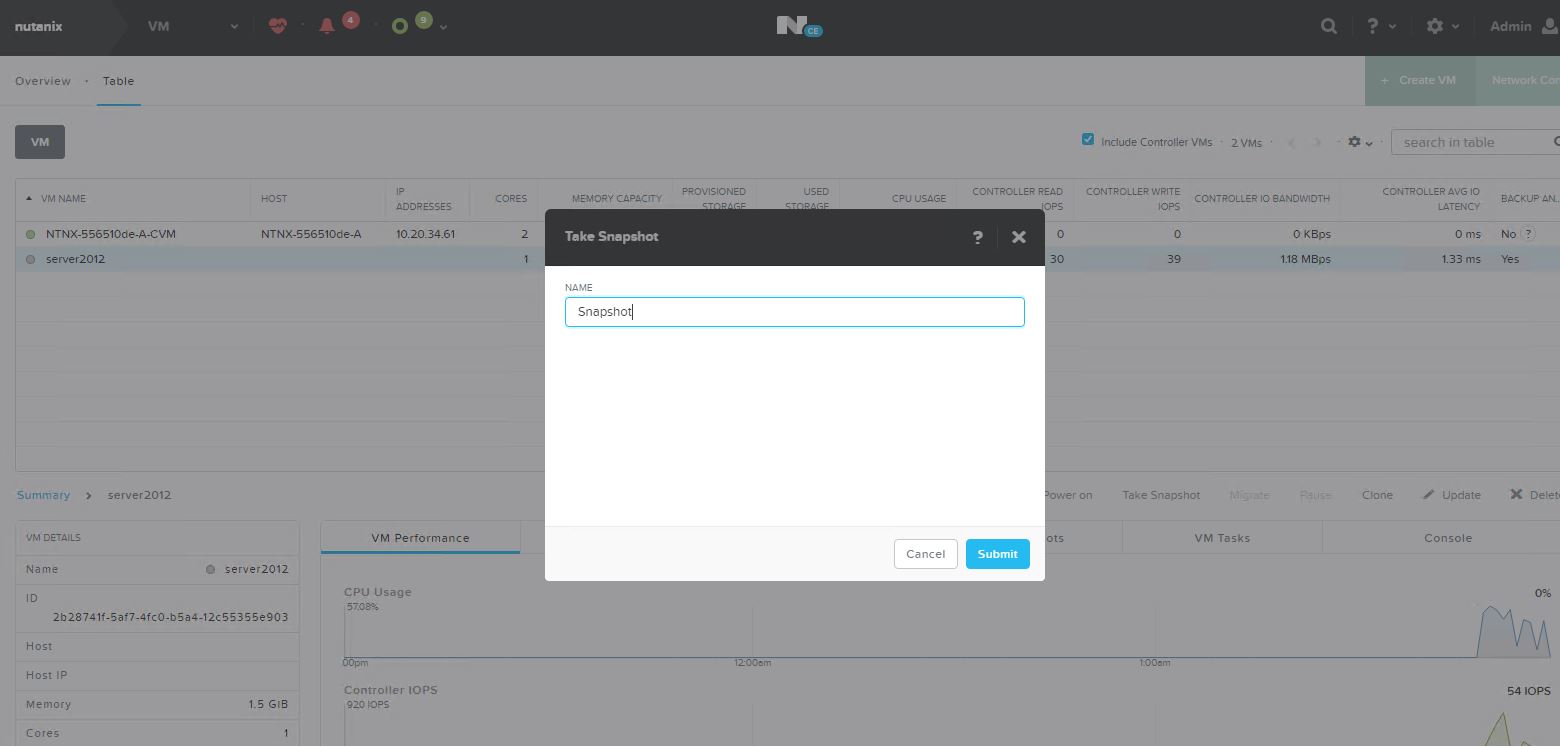
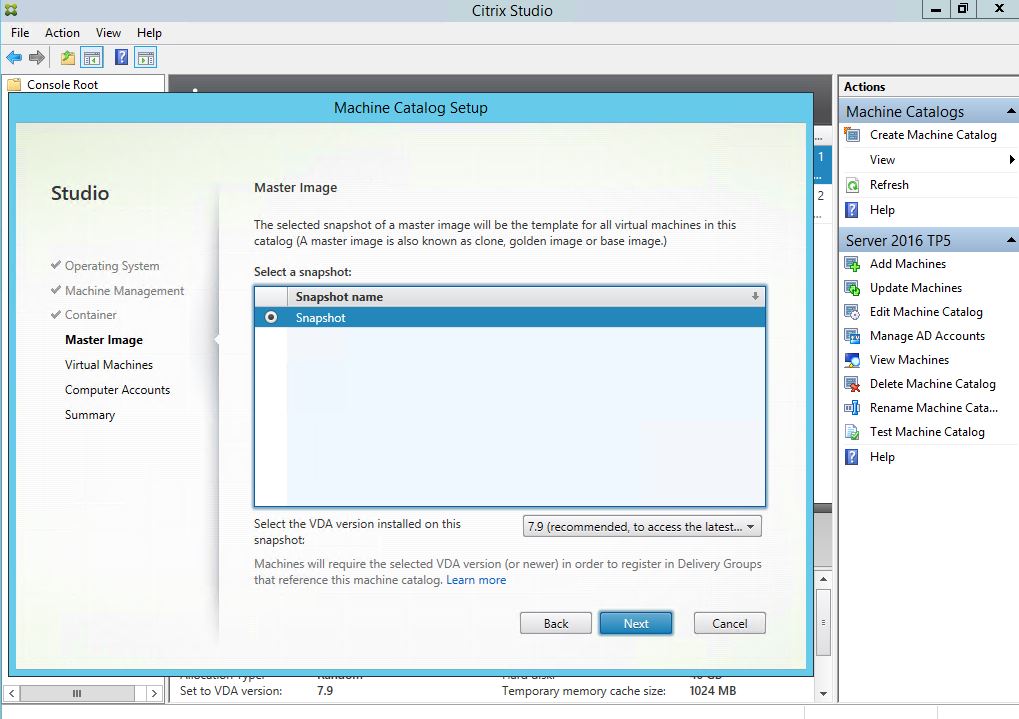
5- Take SnapShot of Base Image on Nutanix CE.
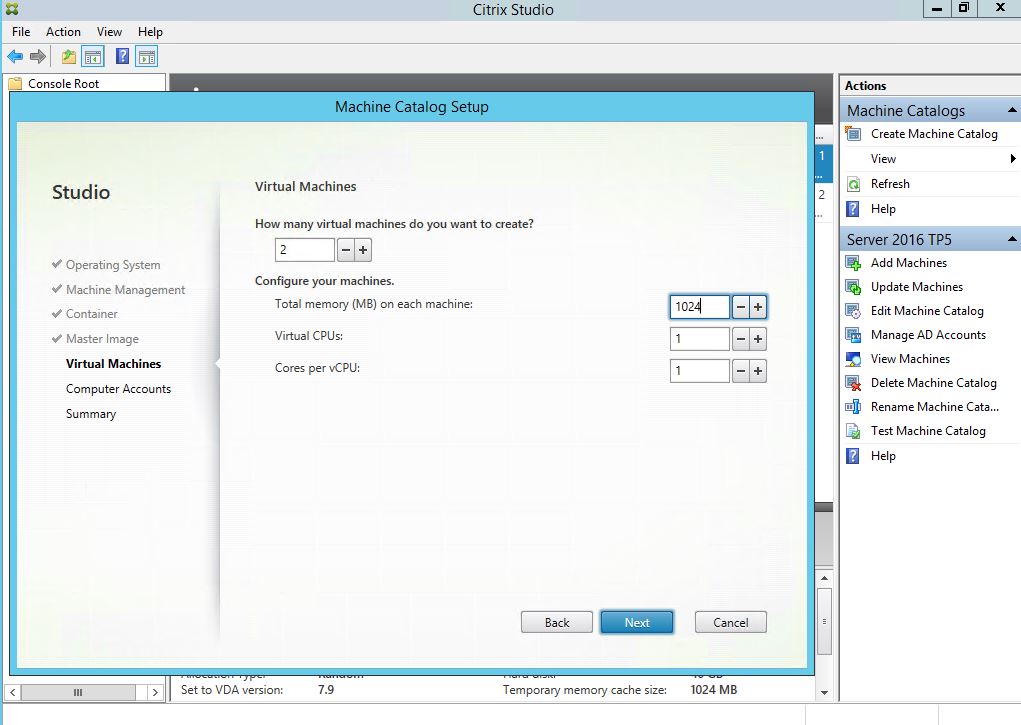
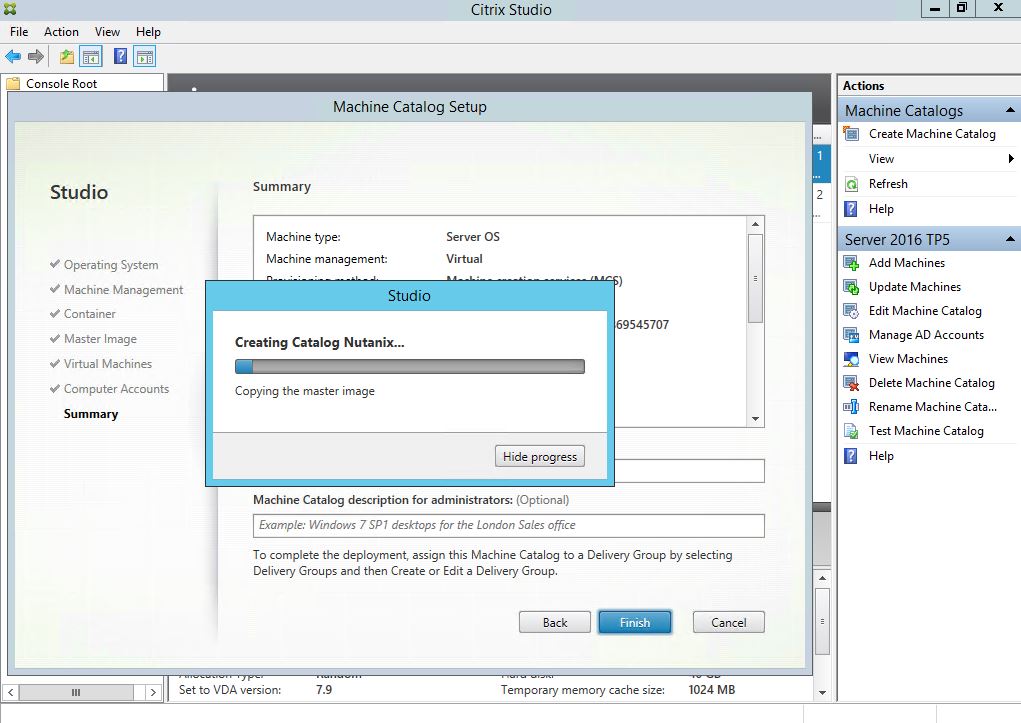
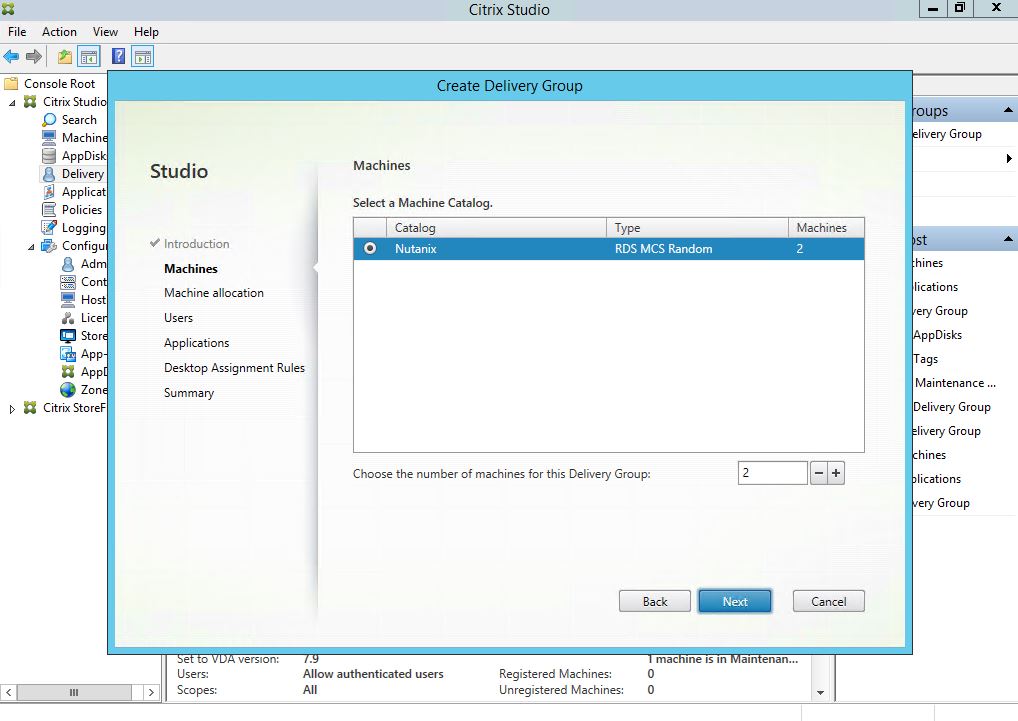
6- Create 2 Session Host servers using XD MCS.


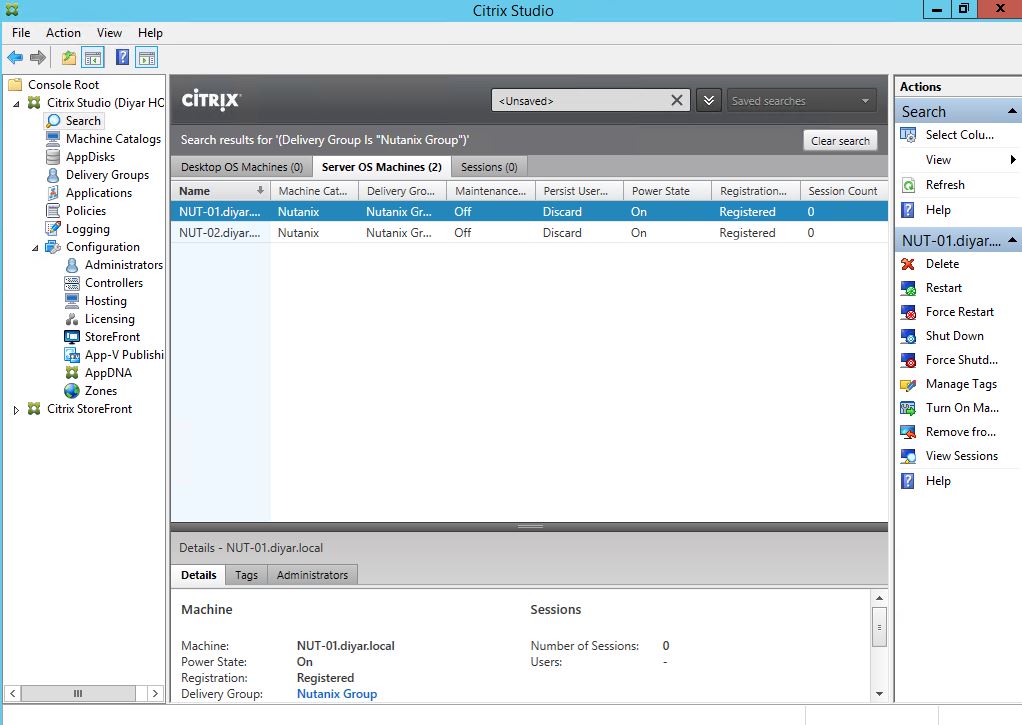
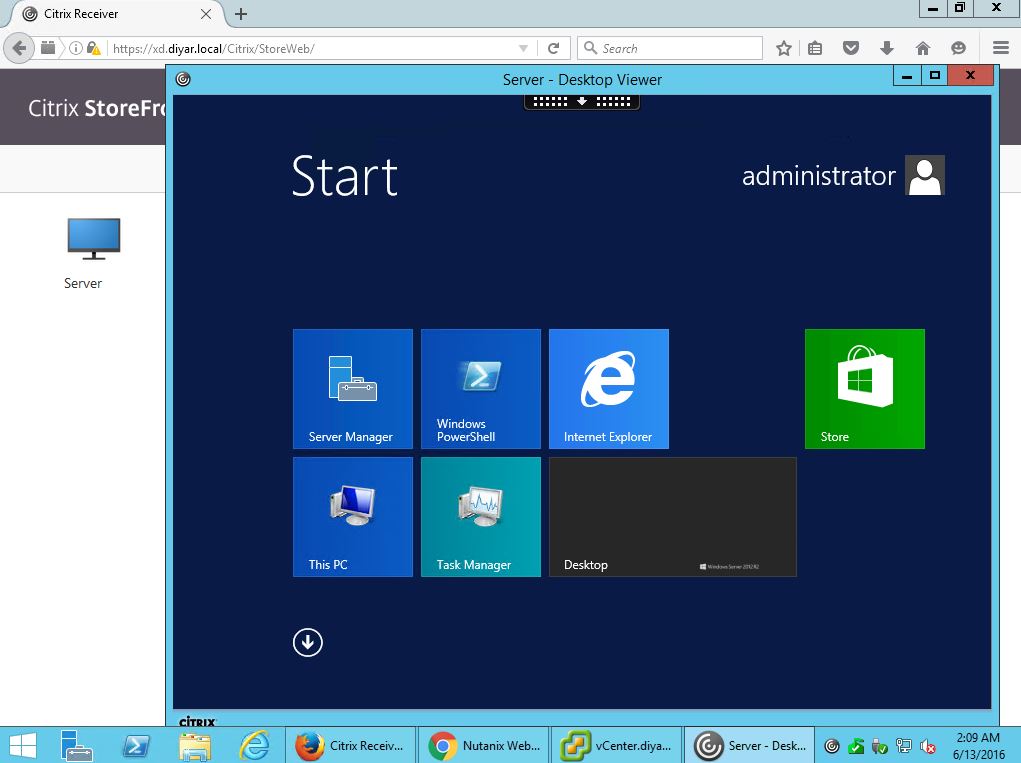
7- Test, Test, and Test.
Conclusion:
We all know the only limitation of MCS was storage , It was never a scaling issue where 500 was thought to be its limit but rather how much storage clusters could take the hit. Now with Hyper-Converged a big part of this issue is mitigated and MCS can now be used for thousands and thousands of virtual desktops. That been said I beleive this is a huge added value for AHV as now it can be introduced to customers under the umbrella of a full VDI supported deployment without workarounds or else wise.
Do let me know if you have comments 🙂 .