
Introduction:
Some applications use an IP address for addressing, licensing, identification, or other purposes and thus require a unique IP address in when using session hosts. In our scenario, my customer had a business app published through XenApp and whenever user launched the business app it connected to the back-end Database server. The database server only accepts connection requests from unique IP adressess and denies other requests from the same IP address.
In a typical XenApp environment, all connection request will originate from the XenApp server IP. So attempts to launch additional instances of an application in a multi-user environment will fail because the IP is already in use. For such applications to function properly in a XenApp environment, a unique IP address is required for every user session or program.
Solution:
The solution is actually based on Microsoft RDS since XenApp uses Remote Desktop Services to function. Microsoft has a solution that is based on Remote Desktop IP Virtualization enabled and configured through Group Policy. A DHCP scope is created, and users connecting to Session Host servers will receive an IP from that DHCP scope. This can be applied to the whole session or just individual applications.
Prerequisites
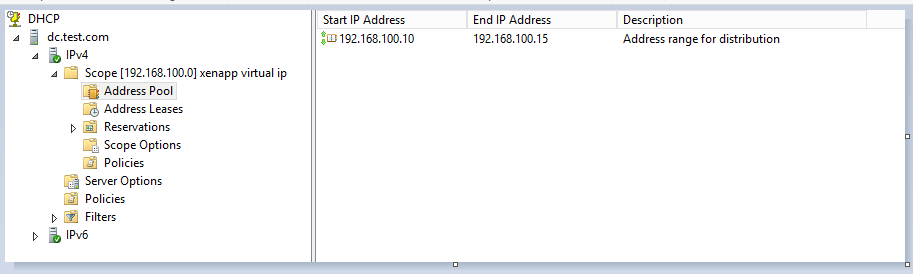
• DHCP scope (IP pool required to assign virtual IP per session or program).
• Group Policy ( Applied to Session Host servers OU ).
• TCPview program to test virtual IP communication.
Configuration:
Step 1: Create a DHCP scope:
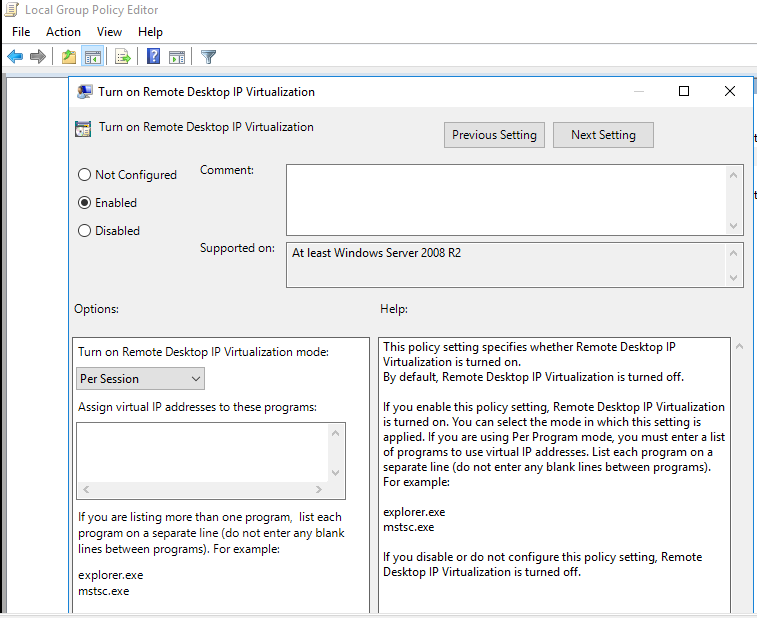
Step 2: Create a GPO either locally on the XenApp servers or in AD, Launch gpedit.msc and navigate to Application Compatibility.
Navigate to Computer configuration -Administrative Templates -Windows Components- Remote Desktop Services -Remote Desktop Session Host -Application Compatibility .
Select Turn on Remote Desktop IP virtualization and click Enabled and select Per session . You can also choose per program and then input the application .exe in the list below it so that will work only for launched applications not the full session,
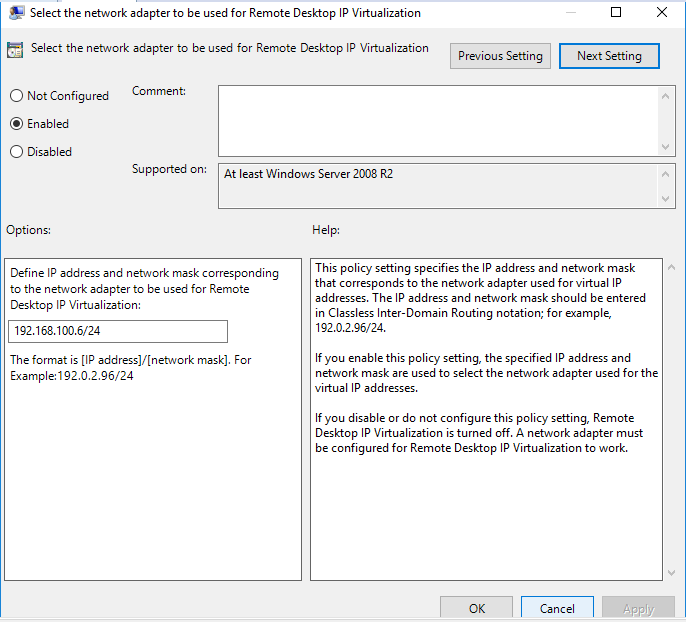
Step 3: Configure the network adapter for IP Virtualization. Double click or right click “Select the network adapter to be used for Remote Desktop IP Virtualization” (typically XenApp server IP) and select ‘Edit’ option to bring up the GP dialog. a. Select “Enabled” to enable this GP and enter 192.168.100.6/24 as Network adapter IP address and mask.
Testing
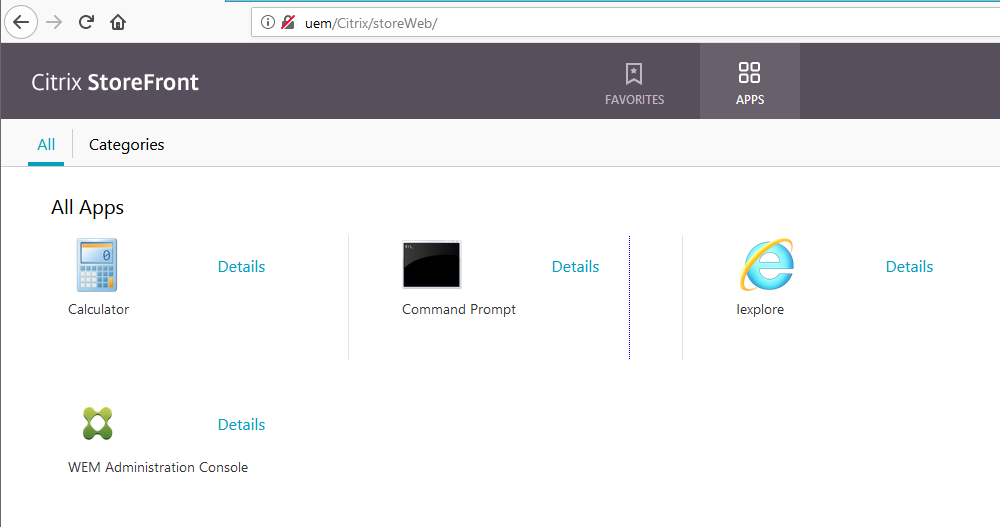
• Publish cmd and internet explorer on studio .
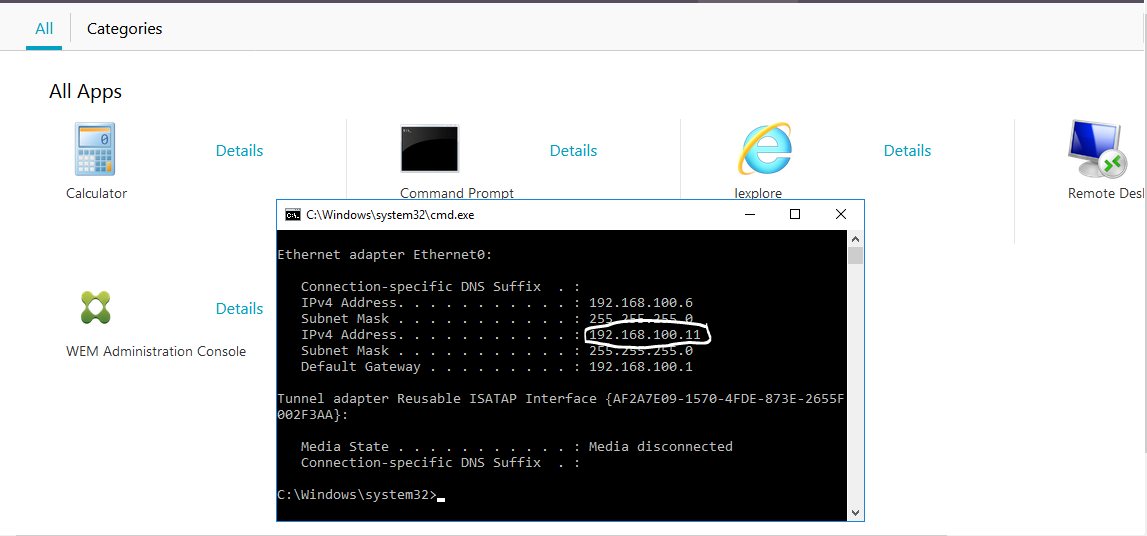
• Launch cmd .
Type ipconfig in cmd and note the Virtual IP .
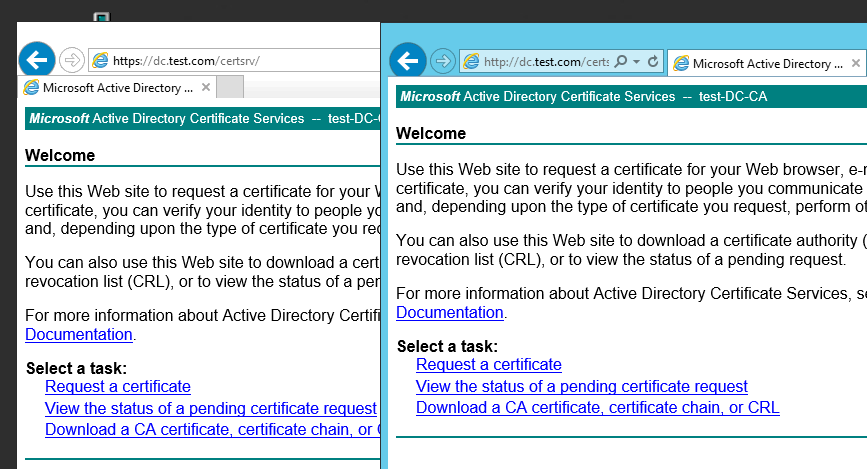
Note down the virtual IP address and launch internet explorer and browse to certificate authority server for example or any IIS server over http and https .
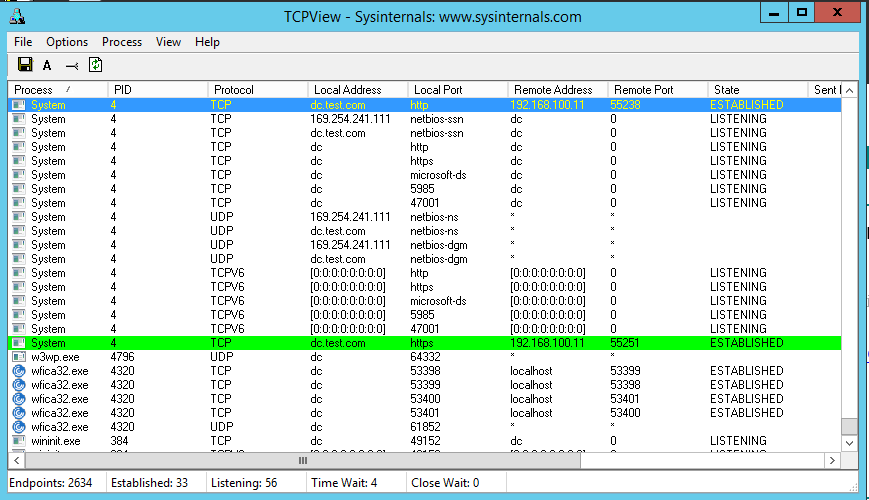
On the certificate authority server launch TCPview to check the connection, notice that the connection is coming from virtual IP on http and https instead of XenApp server IP.
Conclusion:
Many legacy applications require a unique IP for every connection either for licensing purposes or just for it to function properly. As we move to web based applications, the need for such features will continue to diminish.